
This guide explains how to configure an LLM API key in Intella to use the Intella Assist feature.
In this example, we use OpenAI's ChatGPT as the LLM provider. However, the choice of provider and model is entirely up to you and should be based on your requirements, performance expectations and budget.
Important Note: This guide is based on Intella 3.1.
1. General Information
LLM providers and their models evolve rapidly, so some information in this knowledge base (such as videos or screenshots) may become outdated over time. For the most up-to-date information, always refer to the official OpenAI documentation: https://developers.openai.com/.
You may also notice references to Chat GPT-4o in Intella. GPT-4o was OpenAI's flagship model when Intella Assist was developed. In general, any OpenAI model that offers capabilities comparable to or better than GPT-4o should provide a suitable experience when using Intella Assist.
If you do not already have an OpenAI account, create one by visiting the ChatGPT website: https://chatgpt.com/.
3. Add a payment method
Before you can use the AI API, you must add a valid payment method to your account with your chosen AI service provider. Vound does not charge for this feature; however, API usage is billed directly by the provider. Be sure to configure billing with your provider before using this service. For step-by-step instructions you can refer to this video tutorial: https://www.youtube.com/watch?v=aIrBlR8V8k0
More information about OpenAI billing can be found in the documentation: https://help.openai.com/en/articles/9039756-managing-billing-settings-on-chatgpt-web-and-platform
4. Generate an API key
Create an API key that will be used by Intella to access the selected LLM.
For instructions you can refer to this video tutorial: https://www.youtube.com/watch?v=UqGn6Ln4oao
⚠️
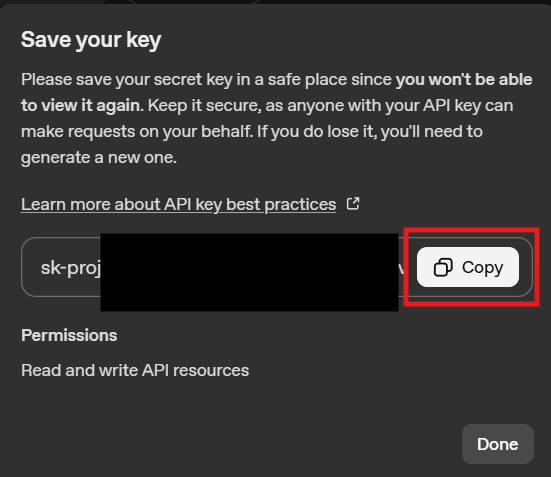
Important: In the final step, you will receive your API Key. This is the only time it will be displayed. Be sure to copy and securely store it, as you will not be able to view it again. Click the Copy button to copy the key to clipboard:
In the next section you will learn how to insert the API key in Intella.
Important Note: Keep your API key secure. Anyone with access to the key can use your OpenAI account and may incur usage charges.
5. Add the API key to Intella
- Start Intella and open a case.
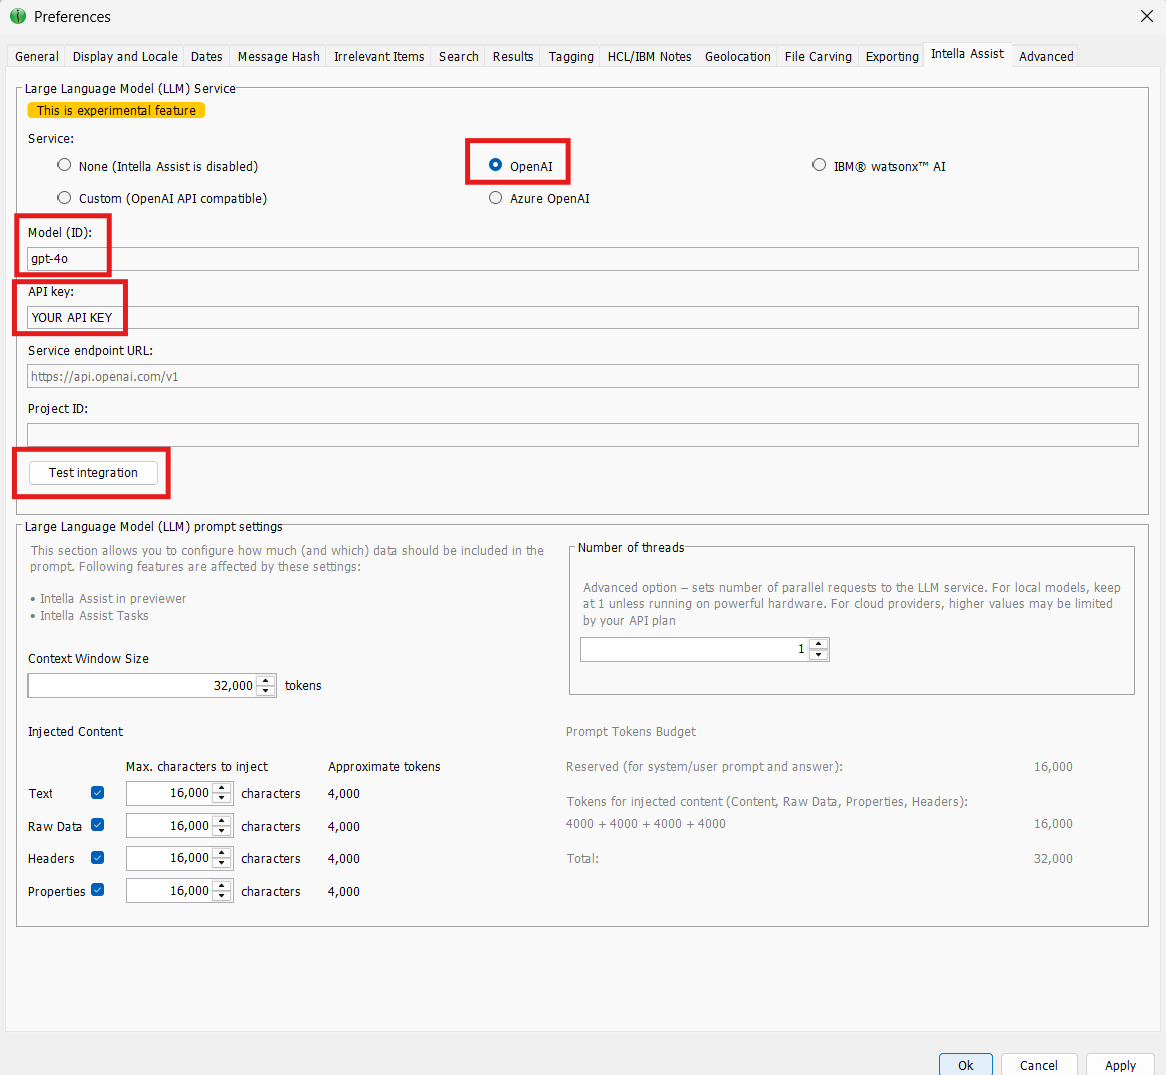
- Go to File > Preferences.
- Select the Intella Assist tab.
- Select "OpenAI" in the Service field
- Choose the model you would like to use. The default model is gpt-4o.
- Enter your API key in the API key field. The best way is to paste it directly.
Below you can find a screenshot with highlighted fields for reference:
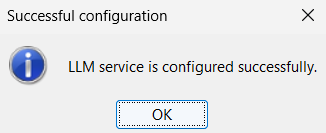
- Lastly, click Test Integration to verify the configuration. If the verification is successfully, you will receive the following message:
For more information about Intella Assist configuration and usage please refer to:
- the Intella User Manual: https://vound.info/intella-assist-desktop
- article that explains connection between Intella Assist and LLM Integration: https://vound.info/assist-llm-integration
- our YouTube playlist about Intella Assist usage: https://vound.info/intella-assist-playlist