Introduction
Let's take a closer look at what this means.
Intella version 3.0.x introduces significant updates to memory
management compared to previous versions of Intella, aiming to improve performance and efficiency during
indexing. This article details these changes and how to configure them in Intella Investigator, Intella Connect, and Intella Node. The settings are the same for the Intella Investigator and Intella Connect products, so this article's screenshots may reflect either or both products.
You can also view this article in video format at the following link:
Looking for memory management for Intella Desktop, including Intella 10, 100, 250, and Pro?
See this article instead:
Key Changes for Intella Investigator, Intella Connect, and Intella Node
1. Separation of Memory Management: Case sharing memory will be solely handled by Investigator and Connect, while indexing-related settings will be handled by Node.
2. Individual Node Configuration: Each Node's memory settings can now be configured individually, on a per-Node basis.
3. Global Node Memory Settings: Node memory settings are stored globally and don’t depend on the case being indexed.
Let's take a closer look at what this means.
Memory settings are accessed in two different places.
Case sharing memory can be found in the case settings, and indexing-related memory can be found in the Node configuration settings.
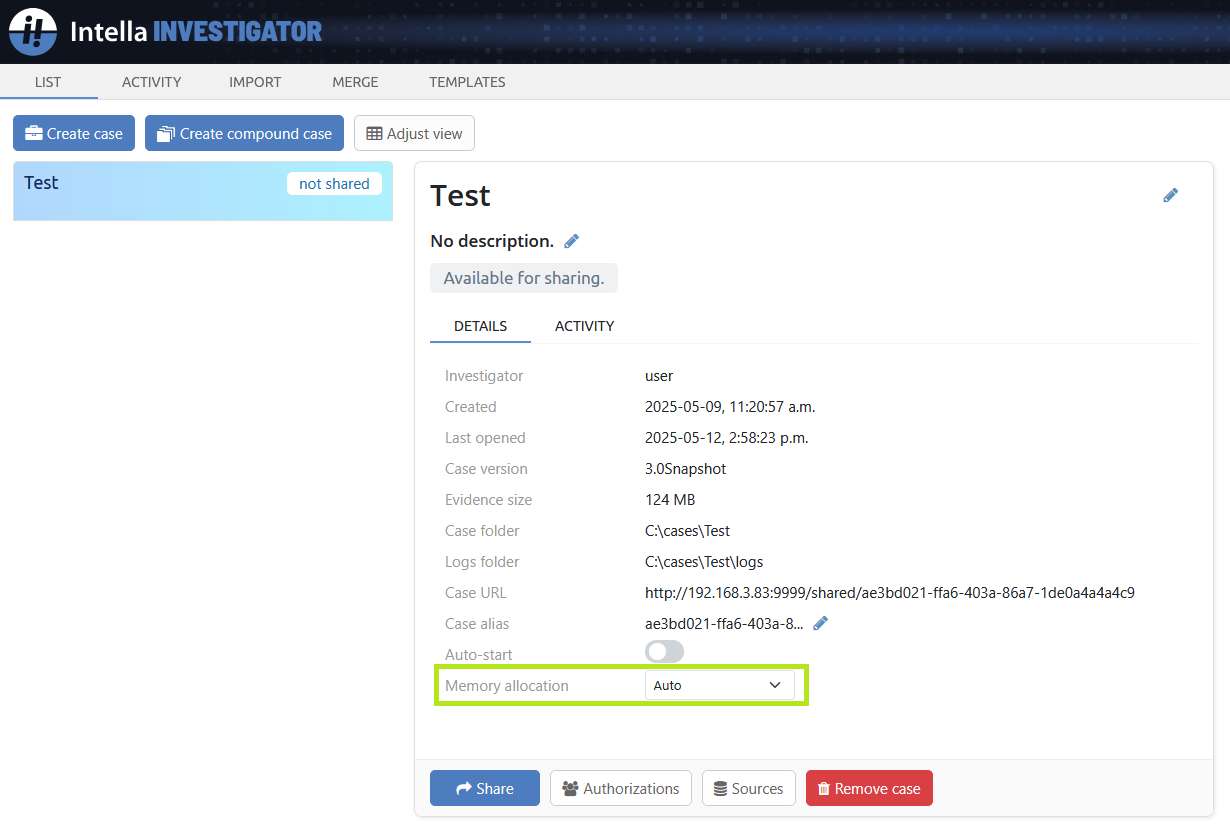
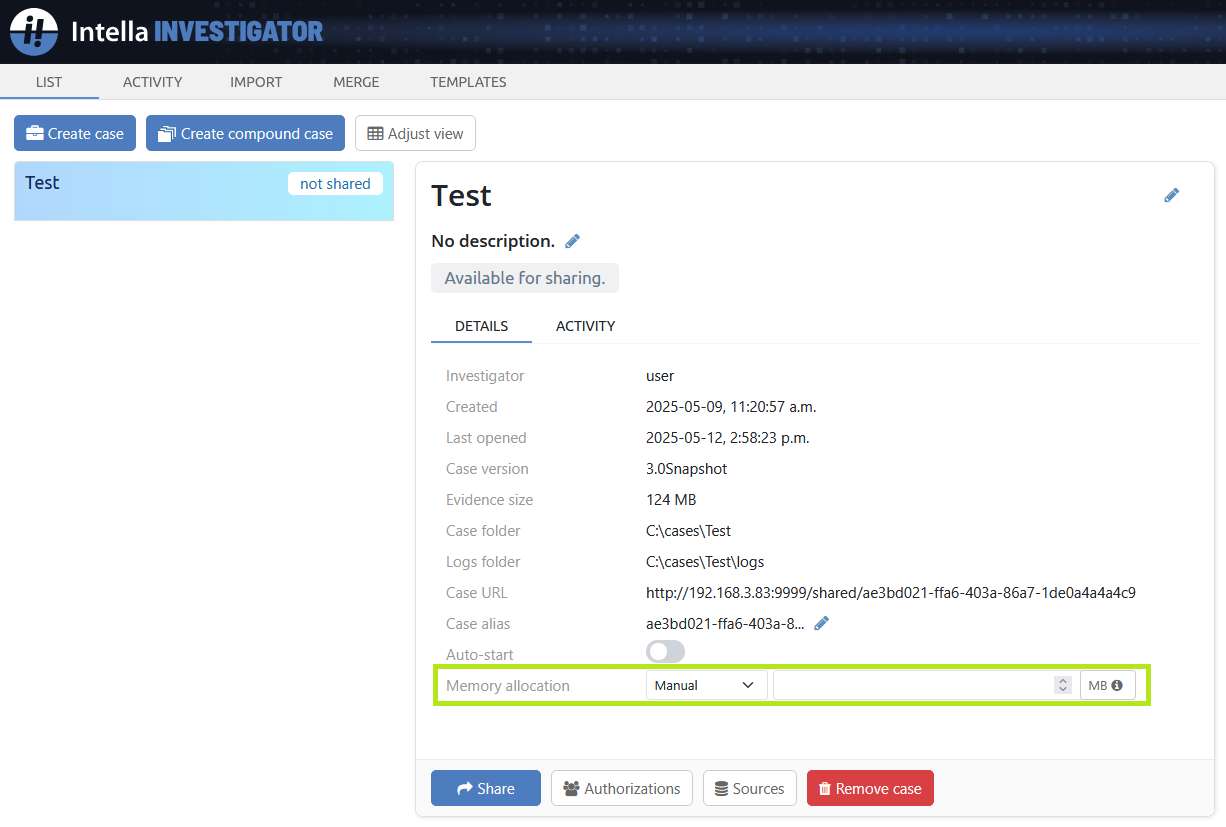
Case Sharing Memory Settings
To access the case sharing memory, log in to the Investigator or Connect dashboard, and select a case to view the case settings.
You will see one memory-based setting here called Memory Allocation, which
only controls the amount of memory used when case sharing.
To configure this setting, there are two options available through the pull-down menu.
Note that settings will be saved automatically.
1. Auto: This mode functions like previous versions of Intella, and is recommended for most users. It is also the default setting.
2. Manual: This mode allows you to override the allocated case sharing memory, specified in megabytes. You can either type in a value here, or use the increment/decrement arrow buttons.
Indexing Memory Settings
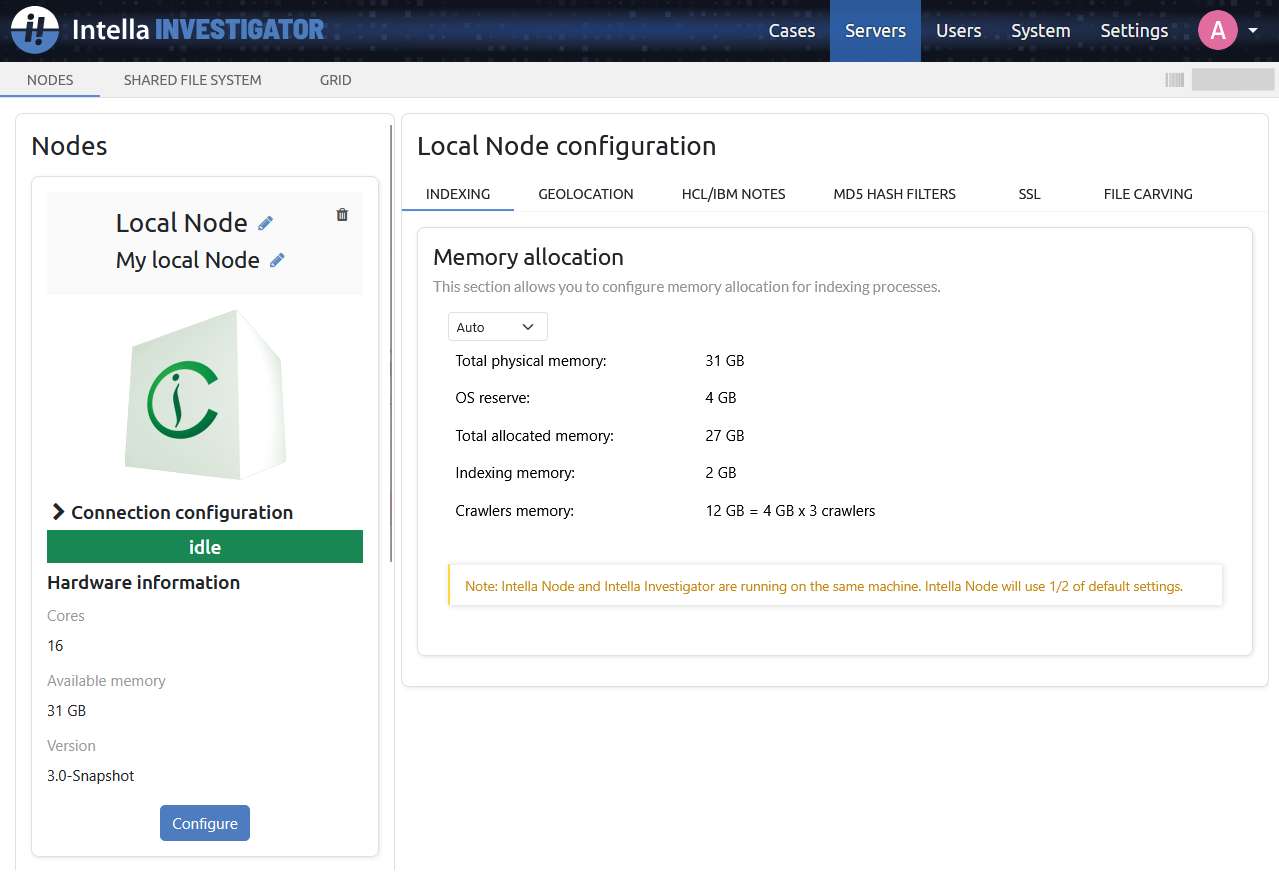
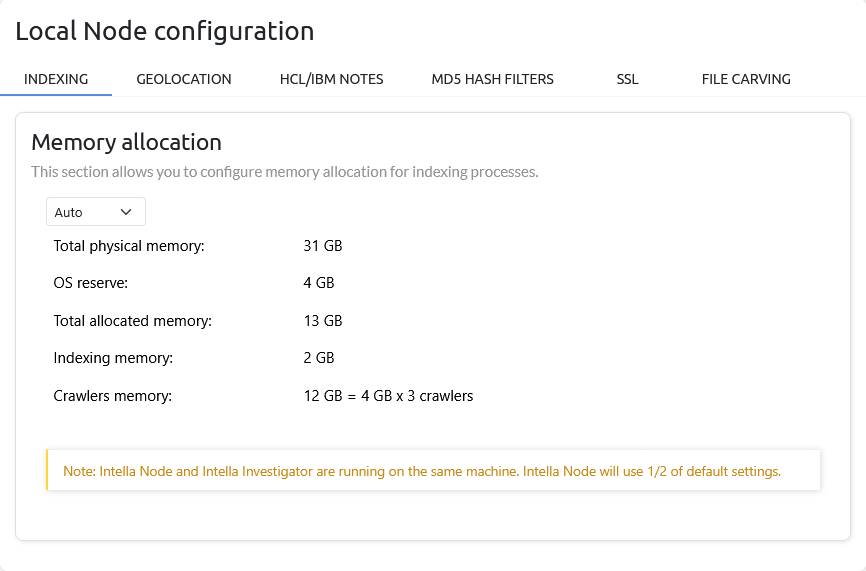
All indexing-related memory settings can be found in the Node configuration area.
From the Intella Investigator or Connect dashboard: click "Servers," then click the "Configure" button on a specific Node.
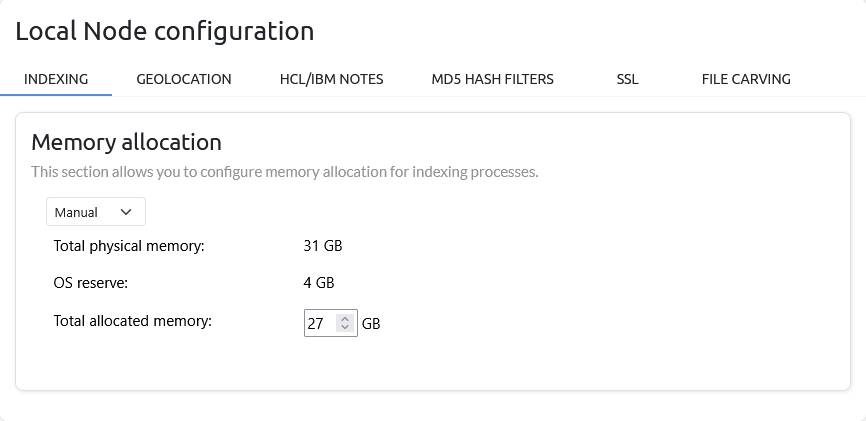
There will be a new indexing section that will show the total physical memory** detected and its allocation to different indexing-related resources.
You can also configure these settings here, if you wish.
**Note: Intella only uses physical memory, not virtual memory.
Understanding the Settings
Let's go through each setting:
- Total Physical Memory: The total amount of physical RAM detected on the system. Note that Intella only uses physical memory, not virtual memory.
- OS Reserve: The memory reserved for the Windows operating system.
- Total Allocated Memory: The total memory available for Node, calculated as "Total Physical Memory" minus "OS Reserve."
- Indexing Memory: Memory used by the lightweight crawler coordinator process for indexing. This rarely needs adjustment.
- Crawlers Memory: Memory used for the "heavy-lifting" portion of indexing, including both crawling and post-processing stages.
Memory Configuration Options
To configure these settings, there are three options.
1. Auto: Node automatically uses all available physical RAM. This is the default setting, and is recommended for most users as it is ideal for maximizing indexing performance and is generally the best choice for most situations. Settings cannot be adjusted in this state.
2. Manual: Allows restriction of Intella's overall memory usage.
You might use this option if you're running other memory-intensive applications simultaneously and need to limit how much RAM Intella uses. However, we recommend shutting down other memory-intensive applications and using "Auto" mode instead, as it allows Intella to perform at its best.
3. Advanced:
Provides fine-grained control for more technically skilled users regarding indexing memory, crawlers memory,
and crawler count. Typically used for specific, tailored performance adjustments when needed,
or as requested by Vound Support.
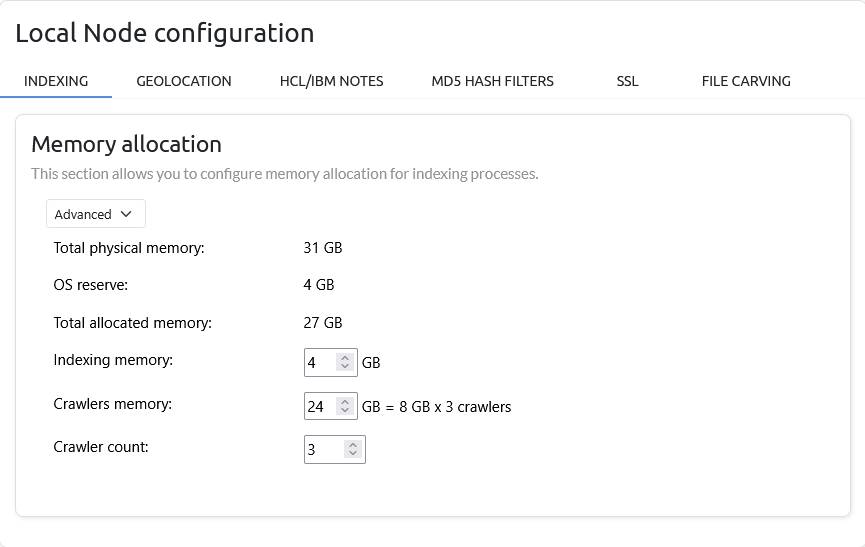
For instance, you might choose to decrease the number of crawlers while allocating more memory to each individual crawler.
Important Notes
The following should be kept in mind when adjusting Node's memory settings:
- Node memory settings will apply to all cases processed by that Node.
-
If both Investigator and Node, or Connect and Node, are running on the same machine, then Node will automatically use only half the default memory to ensure there is enough memory for case sharing. This can be overridden in "Manual" mode.
- Each Node's settings can be adjusted individually, which may help in situations where you have multiple Node servers and they have differing hardware capabilities.
Overall Recommendations
- For most users, we recommend using "Auto" mode in the Investigator/Connect and Node is the recommended setting.
- The "Advanced" mode in Node should only be used by technically skilled users or as instructed by Vound Support.
Updated May 13, 2025